
Why you should set up a professional business email with Gmail.
You’ve started a new business and you’re ready to be taken seriously. You’ve registered a business name, and hopefully, you’ve also registered the domain name.
You’re open for business.
Now you’re probably wondering, what’s next?
An email address so people can enquire about your services and you can forward an invoice. Easy you say, I’ll just go to Gmail and create a free email address that goes something like this: [email protected].
Let me explain why this is a bad idea.
Build Customer Trust With a Professional Email Address
Most business owners work really hard to achieve credibility in their business.
If you want to be perceived as a credible business owner, you need to have a professional email address and that looks something like this: [email protected]
Both email addresses are valid, but they evoke two completely different perceptions. One looks like you’re treating this as a hobby, the other looks like you’re running a plausible business.
What Are the Benefits of the Paid Version of a Gmail Email?
The cost of a business email address with Gmail is $5/user/month.
- It has already been mentioned, but it’s worth saying it again – if you have serious ambitions to grow your business, an email address ending in your domain name is invaluable. For $5/month, Gmail provide you with 30GB of inbox storage.
- You can access your emails and documents from your computer, phone or tablet. Your business email address is also compatible with Microsoft Outlook and other email clients.
- You also gain access to extra features such as Sheets (create, edit and share spreadsheets with customers or your team), Forms (create custom forms for online surveys and questionnaires), Slides (create, edit and present polished presentations) and Sites (create an intranet-style resource for your customers or team).
- Gmail guarantees 99.9% uptime.
- You can trial it for FREE for 30 days.
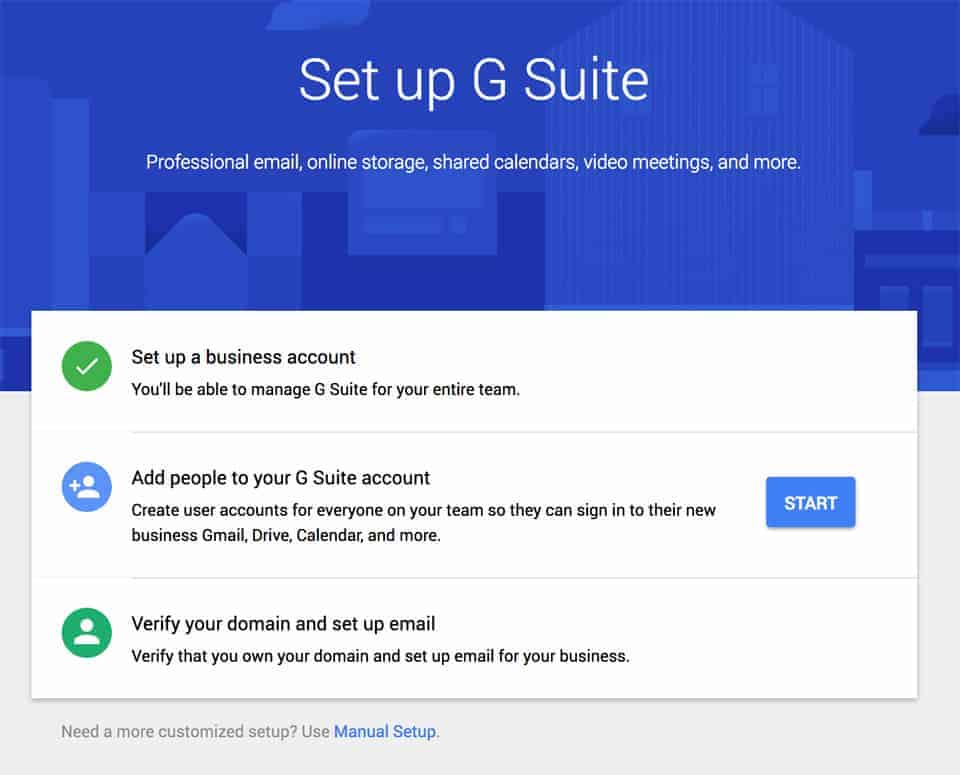
How to Set Up a Business Email Address
Following are the steps required to help you set up a business email address with Gmail
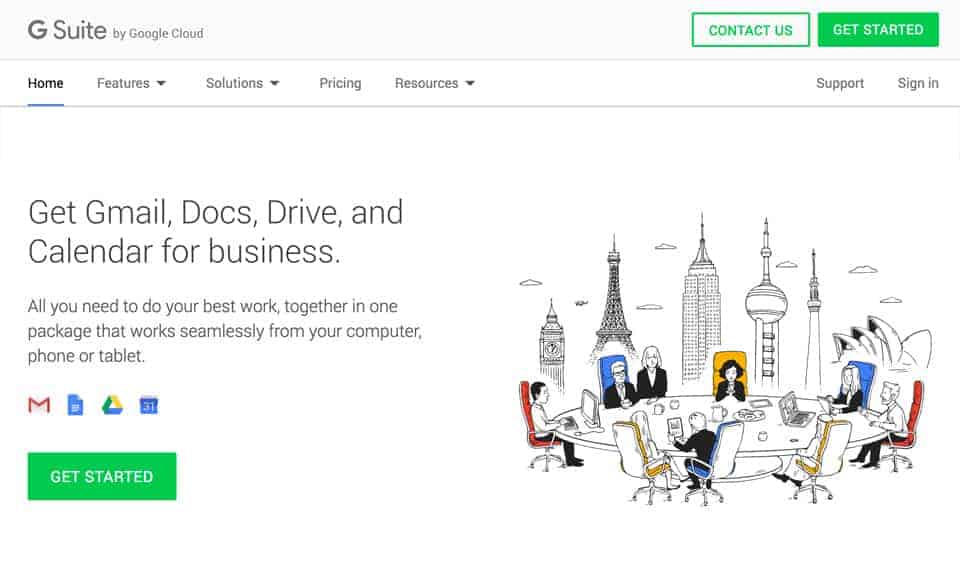
Step 1.
Create an account with G Suite, click on the green Get Started button
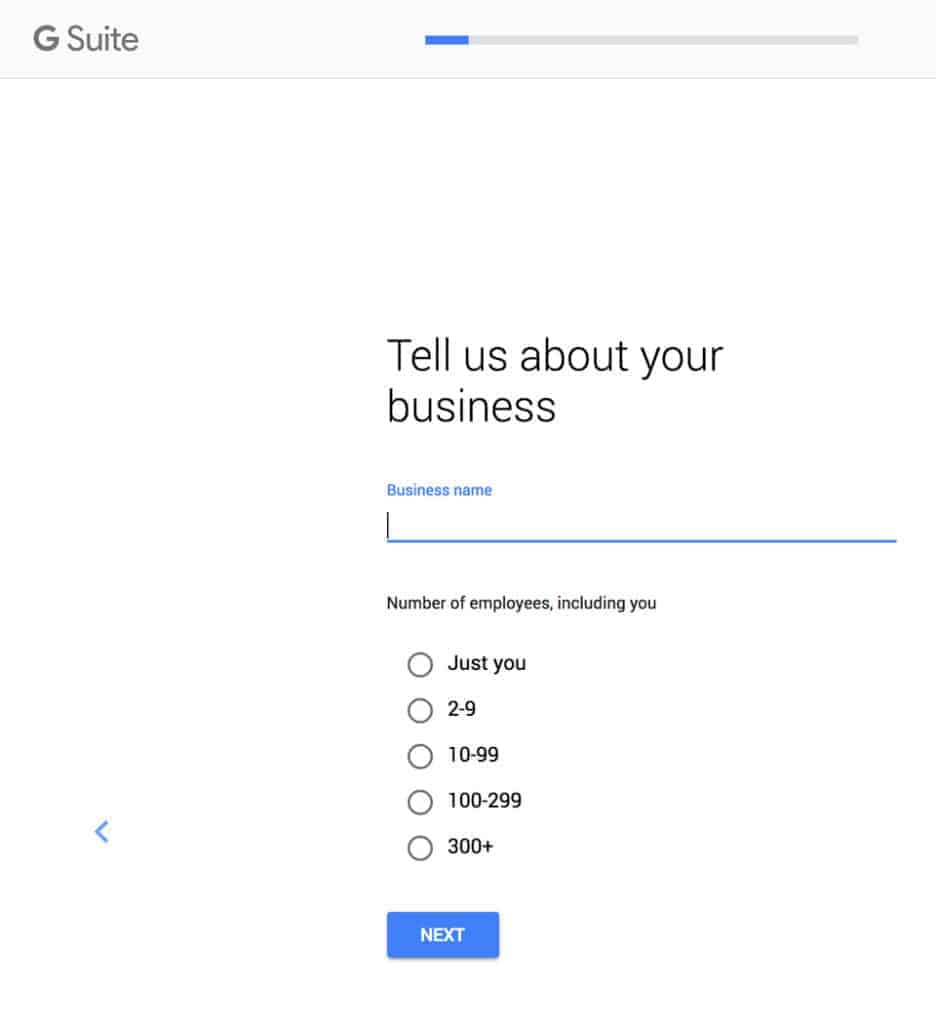
Step 2.
Next, fill in the form by typing in your business name and size
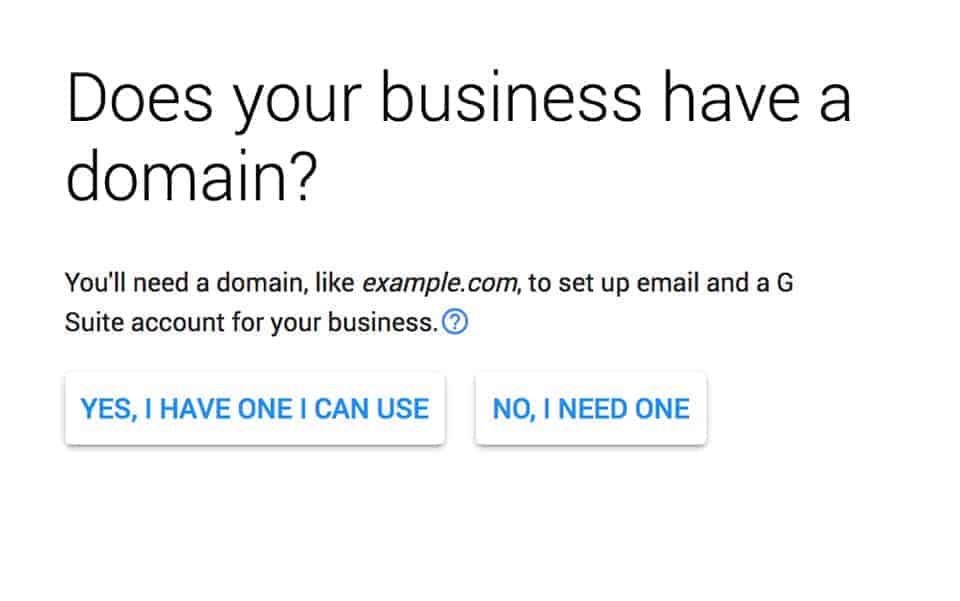
Step 3.
Have you already registered a domain name for your business? If you haven’t, you can register via Google, however, our recommendation is to use Hover. However, if you’ve already registered your domain name (I’ll assume that’s most of you) then click on the Yes button. Further on in this process you will need to verify that you own the domain.
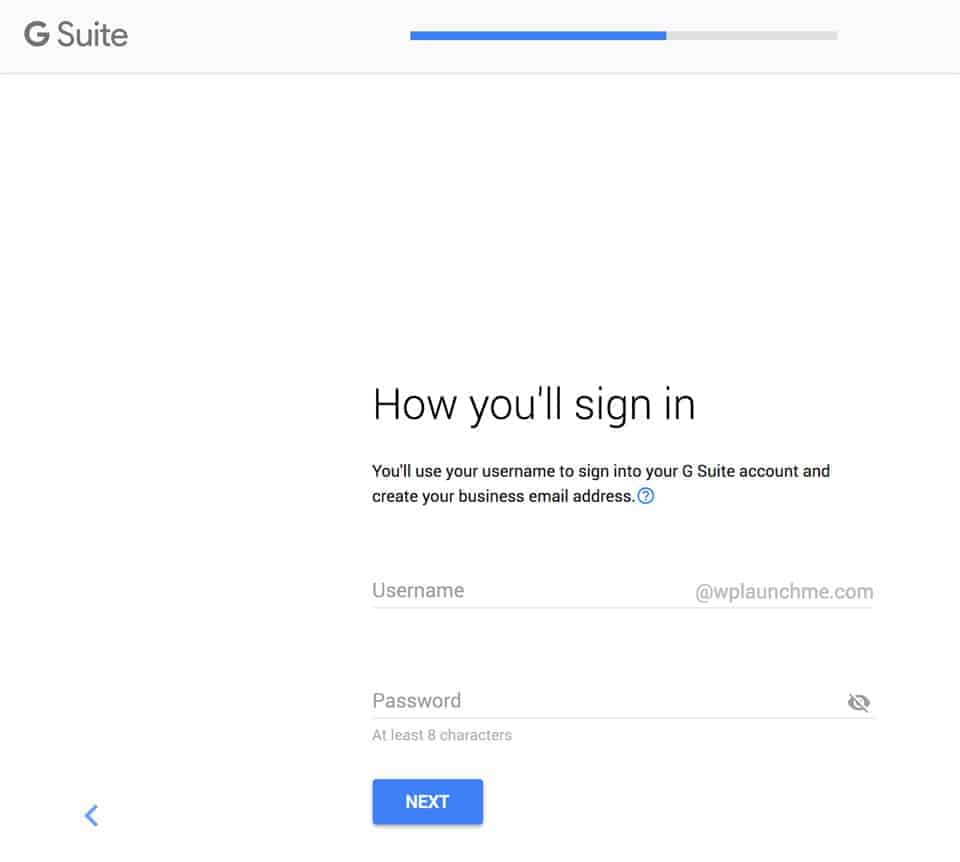
Step 4.
This next step requires you to create an email address. You’ll need to think long and hard about this. For example, do you want a separate email address for accounts and everyday enquiries? Once you’ve decided you can type it in and create a secure password.
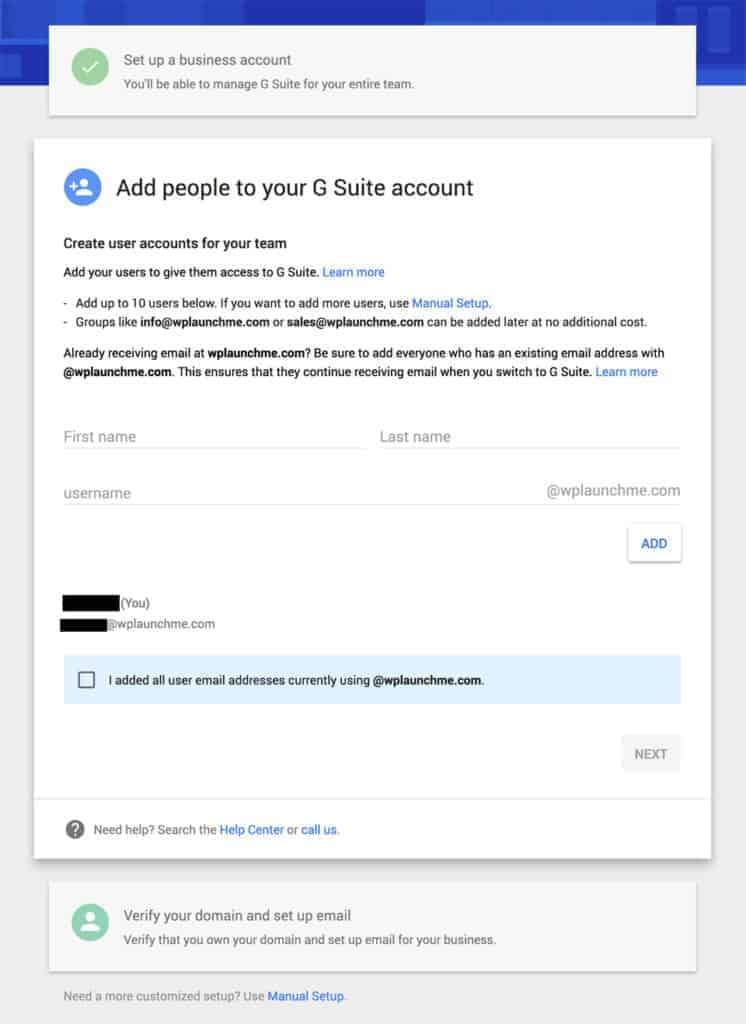
- With the setup process now complete you are ready for the next step. This is where you can add another user email address, click on the Start button.
2. If you don’t need to add any other team members then check the box “I added all user email addresses…” and click the Next button, otherwise follow the prompts by filling in your details and clicking on the Add button.
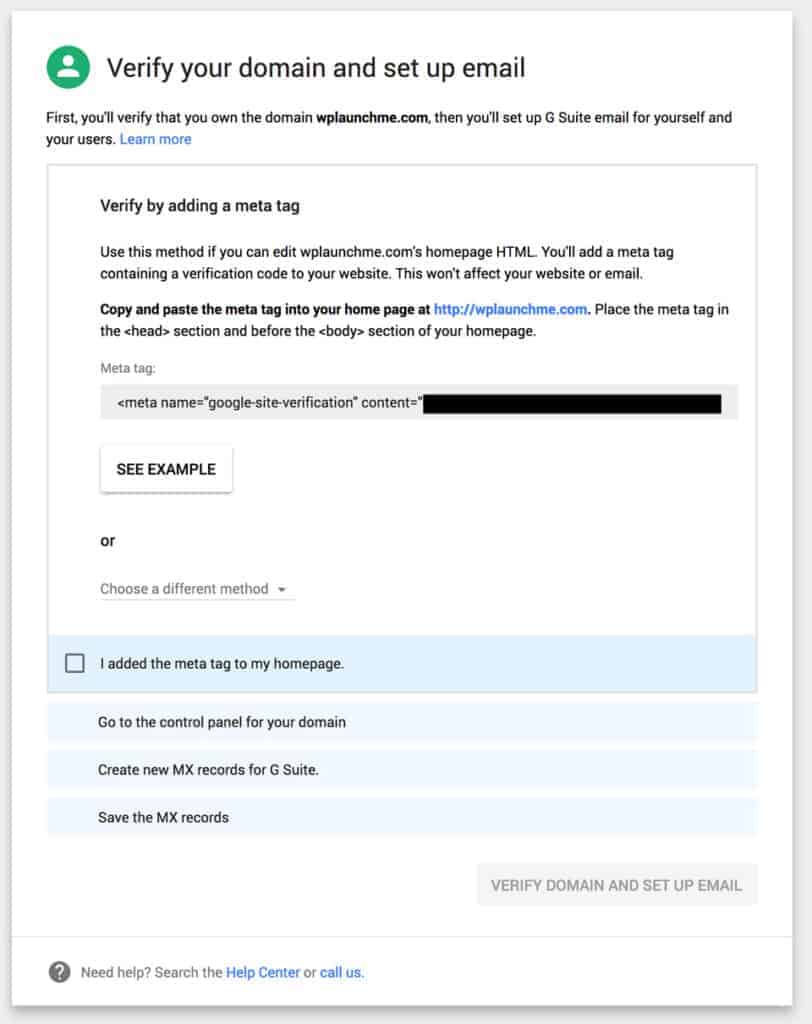
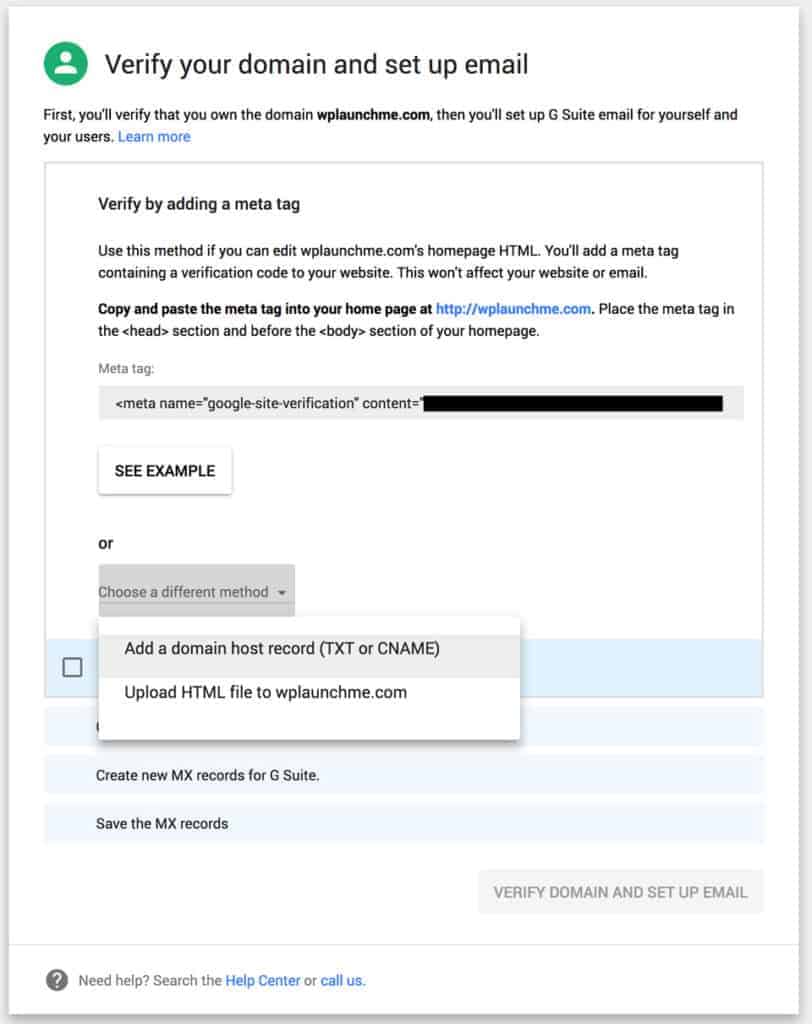
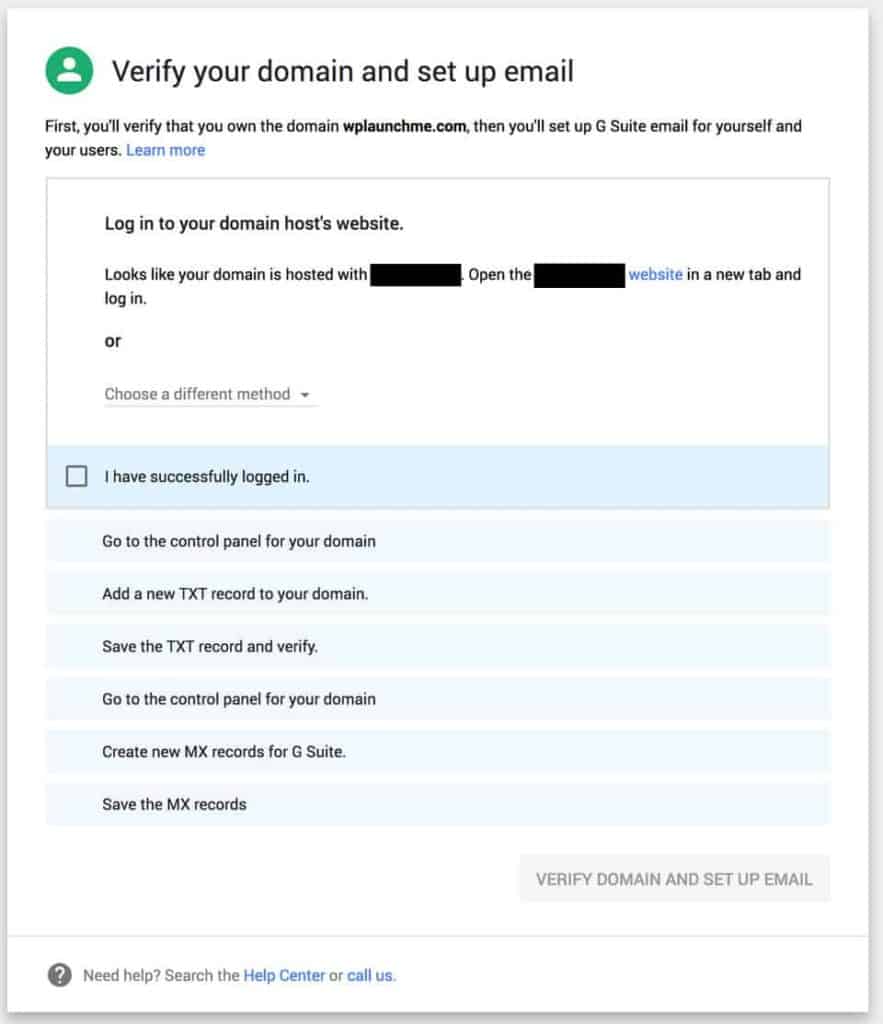
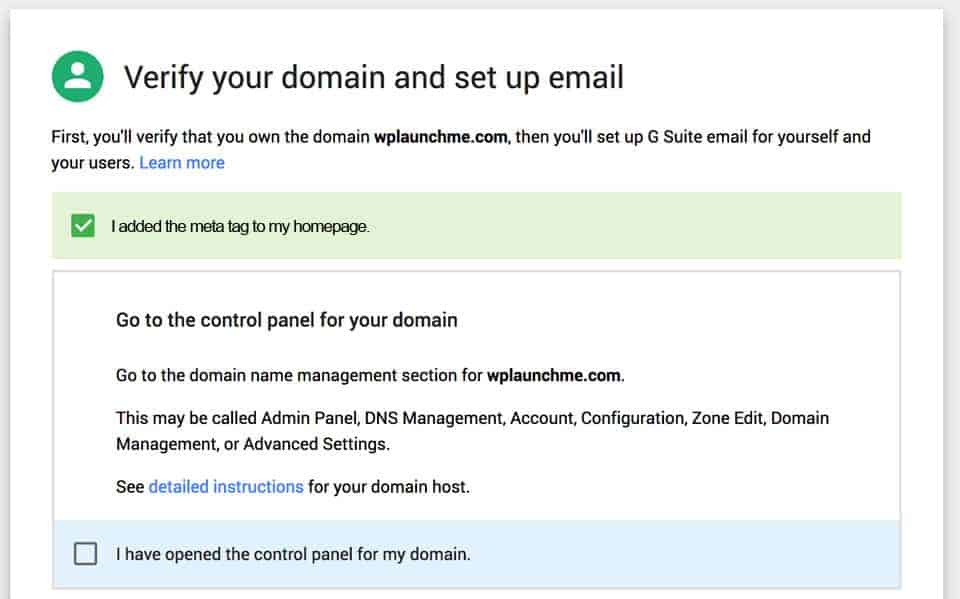
3. This final step takes the longest and is the most complicated, however, necessary so hang in there. The first verification method you can choose is to add a Meta Tag to the <head> section of your website.
Some WordPress themes provide easy access to add code to the header and footer sections of your website, however, if you’re a beginner and your theme isn’t set up this way, the easiest option is to install the Insert Headers and Footers plugin. To install the plugin, navigate to Plugins > Add New > search for ‘insert headers and footers’ > Install Now button > Activate button
To add the meta tag, navigate to Settings > Insert Headers and Footers and paste the code in the Scripts in Header section, then click the Save button.
To complete the step, head back to G suite email and check the box ‘I added meta tag to my homepage’.
Step 5.
This step requires you to have access to your website hosting account. If you are signed up to one of our website care plans we can add these details for you, saving you the headache.This step will ensure your emails are sent directly to Google’s mail servers, allowing you to use the G suite service with your custom domain.If you aren’t signed up to one of our plans, then you’ll need to login to your web hosting account. If you aren’t sure who your host is, see identify your host. As there are various web hosting services this process will vary, Google has provided detailed instructions for over 100 web hosts. Find yours and click through to follow the instructions.Once you’re logged in and you’ve located your admin panel head back to G suite and check the box ‘I have opened the control panel for my domain’.
Step 6.
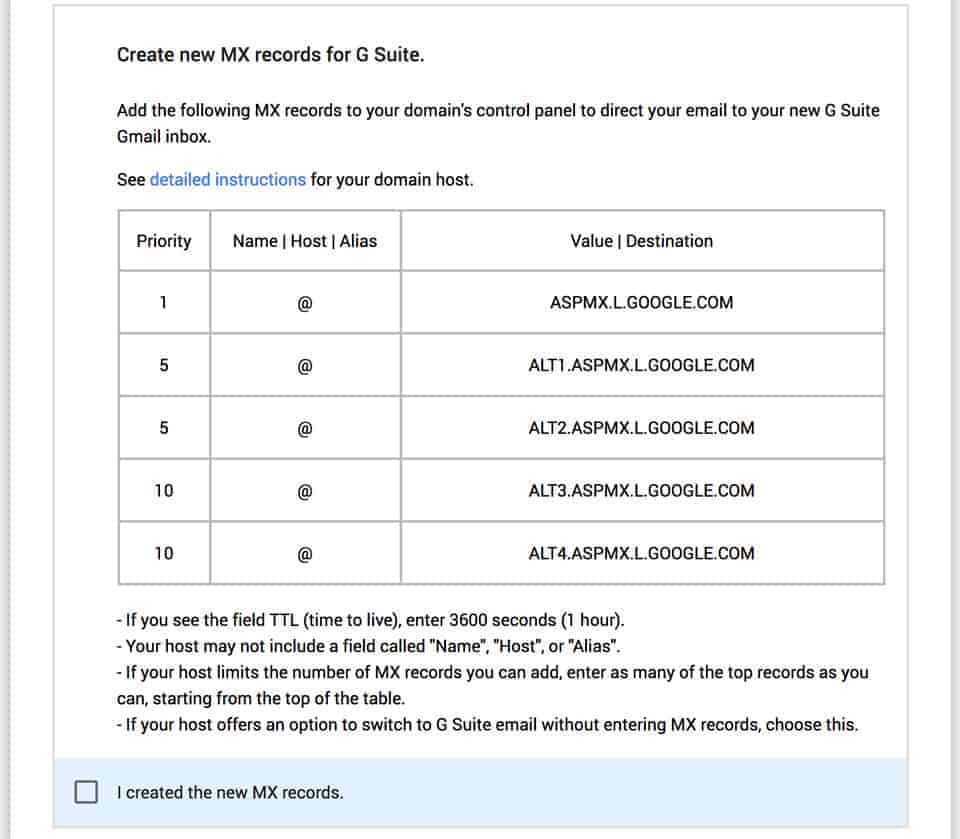
In this next step you will be adding the new MX records provided to your website domain’s control panel. You will need to add them one at a time.This process will direct your custom domain email to your new G suite Gmail inbox.Once you have added all of the MX records, check the ‘I created the new MX records’.Finally, you can check the box ‘I saved the MX records’ then click on the Verify domain and set up email button.After a few moments, you should see a success message from Google letting you know that your domain is verified.
Now that the process is complete, Google’s mail servers will begin rerouting emails directly into your new business email account. This can happen immediately or it can take up to 48 hours, it’s all dependant on your hosting provider.
Before you logout of G suite, I would suggest setting up your billing details so you can continue to use your email after the free trial period expires, without any issues.
Why A Business Email Will Bring You More Money
Being able to communicate with clients using a professional email address makes you look credible. You’ll be in the playing field for high-end clients, which will bring in more money.
While this article focuses on G suite, there are other solutions such as Office365 and Zoho, however, we think for most people G suite is an affordable option.
If you just don’t have the time to set up your business email, we’re here to help. Get in touch with us today and we’ll organise a time to chat about it.
If you found this article helpful please let me know below, or share it with a friend who is still running their business with a personal email account.