1. Image optimisation
Also referred to as image compression, is an art you want to master.
Well chosen images are essential for your branding, they create a professional looking website and can really make you stand apart from your competition.
Few issues with your website, however, can sink you as quickly as a slow loading one. One all too common mistake being made is using images that haven’t been optimised for the web. In English, this means the file size is too large for the web and will increase the time it takes to load your website.
2. Do You Need To Resize Your Image Before You Optimise It?
Prior to uploading an image, you should consider the dimensions it will be displayed at on your website. By correctly sizing an image prior to optimising it, you’ll be shaving off precious KB’s, which can have an incredible impact when applied to the entire site.
3. Which File Format Should You Save Your Images In?
The most commonly used file formats online are JPEG, PNG and GIF. My personal choice is PNG because the quality is higher, however, this also means larger file sizes. So, if I have an image that is large in dimensions (generally a header/hero image) then I generally opt to save it as a JPEG to reduce the file size. However, if I have a smaller sized image such as a logo or a fancy looking button, then I would save it as a PNG.
GIFs are better suited for images with only a few colours, they are also often used to create a basic form of animation. A PNG or GIF file format will also allow you to save your image with a transparent background, a JPEG doesn’t have this option. So if you’re background colour is anything other than white you will need to save it as a PNG or GIF file.
4. Optimising Your Images Before Uploading To Your WordPress Website
If you already have a stack of images on your WordPress website that require optimising, then I suggest using a plugin such as EWWW Image Optimizer or WP Smush to compress your images. You can optimise hundreds of images in just a few minutes by selecting the bulk optimisation option or you can individually process the images (as quick as a click of a button).
Once you have optimised all of your images, however, you should remove this plugin because the more plugins you have on your website, the slower it is to load. The most efficient method to optimising your images is to do it before you upload them to your website.
5. What Software Should You Use to Optimise Images for the Web?
I personally use Photoshop because I am an advanced user having used the application for over 15 years. However, if you don’t have a subscription to Adobe and would rather not pay for an image editing program, then you can use applications such as Compressor.io (has a maximum file upload of 10MB) or Pixlr.
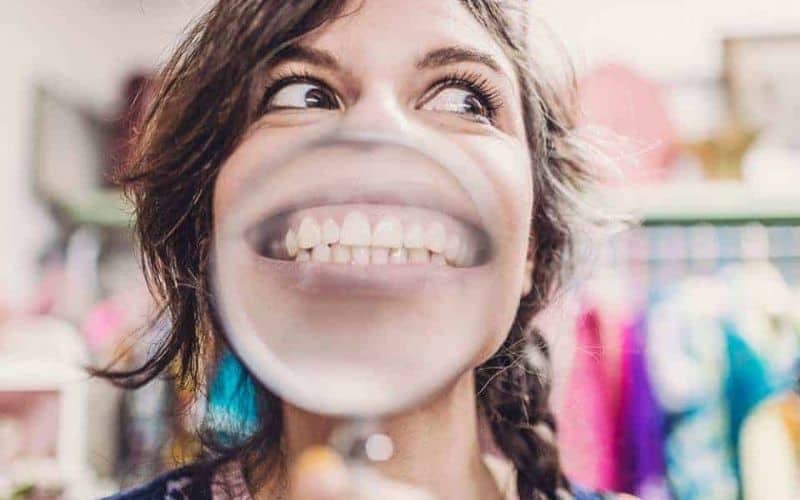
They are browser based photo editors that allow you to edit your images online. They’re FREE and give you plenty of editing choices, but most importantly, you have full control over the final file size output just by moving a slider. As a general rule of thumb, try to keep your image file sizes below 100kb. Below is a before and after comparison using Pixlr at 85% compression rate. As a side note, you can get away with a lower compression rate for images that don’t have a close up of someone’s face in it, because there is less detail to be rendered. With that in mind, I’m actually happy with the quality of the edited version considering the file size!


Click here to watch a quick tutorial showing you how to optimise and resize your images using Pixlr.
There are many free and premium choices available for image editing software, I’d say start with either of these two depending on what platform you’re on:
Pixlr (Mac and Windows)
RIOT (Windows only)
6. Be Descriptive When Naming Your Images
Search engines will not only crawl through the text on your webpage, they will also search for keywords within your image file names. For this reason it’s important that you name the file thinking about how a customer would search for the product on your website. You can also check your website analytics to determine the most common searches. If it isn’t a product but rather an image of yourself for your about page, then be descriptive – you could write your full name along with your business title.
7. Add An ALT Attribute To Your Image
An ALT attribute is a text alternative for an image when a browser can’t render the image. It will still appear if your image has rendered successfully, you can hover your mouse over the image to see it. ALT attributes were originally used to assist screen readers in describing images for the visually impaired. Taking the time to add meaningful ALT text to your website will increase your websites accessibility, which will help increase your search engine ranking. ALT attributes aren’t necessary for every image you use on your website such as a background image.
Top 7 Image Optimisation Tips
- Once you know the display size, resize your image using a photo editor such as Photoshop or PicMonkey.
- Use a photo editor such as Photoshop, Pixlr, Compressor.io or Riot to optimise (compress) your images before you upload them to your website.
- If you have a large image, such as a header/hero image for your website, save it as a JPEG. If it’s a small image, such as a logo or button, save it as a PNG.
- If you already have a stack of images in your media library that need to be optimised, use a plugin such as EWWW Image Optimizer or WP Smush to compress your images.
- Aim to have ALL of your images under 100kb (closer to 0kb, the better) in file size.
- Be descriptive when naming your images.
- Always add an ALT attribute to your image.
Smaller image sizes mean faster page loads. This will make your visitors happy, and may increase your revenue!
Now that you know some of the tools to become an image optimisation master, start compressing your images!
Let us know in the comments section below what image editing tool you love using.
And if you know someone who would find this tip useful, share this with them! You know they’ll appreciate it…